The important thing when choosing an outdoor floor is to choose a ceramic tile with low porosity, which does not absorb moisture from the ground. Porcelain stoneware is a type of ceramic that is characterised by its low porosity (it has less than 0.5% porosity). This means that it hardly absorbs any water, which prevents the tiles from breaking in the event of frost.
In areas where it is not very cold like ours, another problem can occur: if you choose a porous material that absorbs water from the ground, saltpetre stains can occur. This is why a low-porosity material such as porcelain stoneware is the best choice for outdoor flooring.
When renovating outdoor flooring, it is important to choose the right tile, but also the right type of adhesive. For porcelain stoneware, being a non-porous material, you will have to use cement glue, an adhesive with a cement texture.
There are several types: CE type tile adhesive (suitable only for indoors and for materials with some pores), C1 type (suitable for outdoors and for non-porous porcelain stoneware) and C2 type (suitable for tiling walls and for large-format tiles).
Before starting work, the ground must be properly prepared. It is very important that the surface on which you are going to lay the tiles is completely level. Furthermore, it is not advisable to lay the tiles directly on the ground, but on a layer of cement about 5 cm thick.

The surface must be flat, stable and clean. Scrape off any rough spots and clean thoroughly – If it is hot, moisten the area well.

How to mark the reference points?
To mark the cut-outs, draw a perpendicular line from the facade to the outer edge of the terrace. Make a complete row of tiles along this line, interspersed with crosses to mark the joints.
Make a second line perpendicular to the first line by positioning yourself at the outer edge of the last tile. Lay the first tile at the intersection of the two lines.
How to lay the tiles?.
Prepare the glue mortar, add a sufficient quantity of water and knead the mixture with the trowel until it is consistent, homogeneous and without lumps.
Gluing
Spread the adhesive mortar with the trowel along the marked line slightly wider than the first row of tiles. Please note that the tile adhesive dries quickly in the open air.
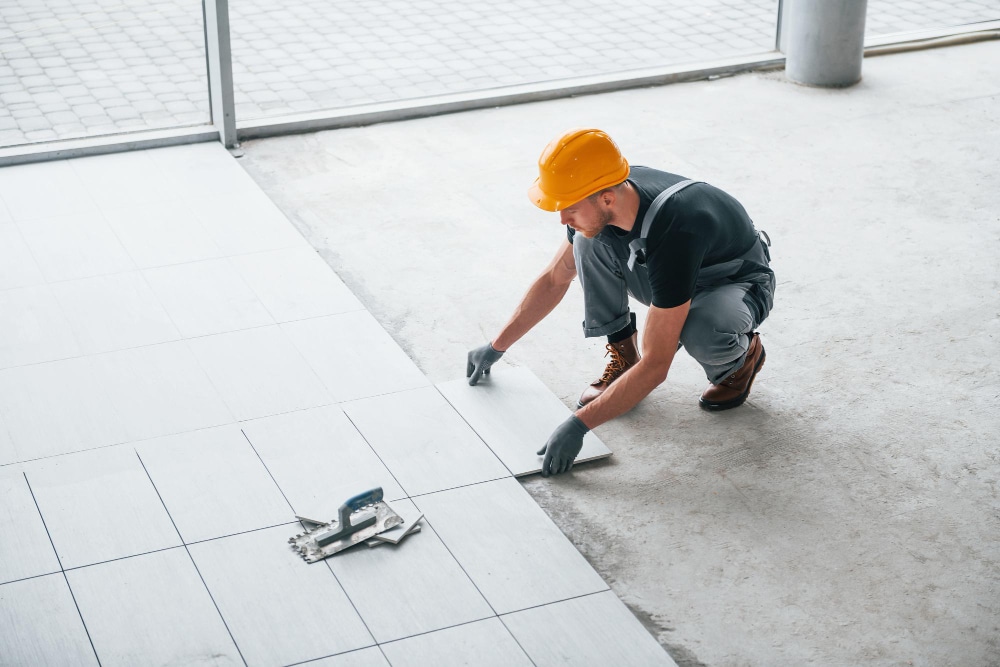
Once the tile adhesive is ready, you can start laying the tiles. In a large space, start from the centre, so that the cut-outs on the sides are symmetrical. If the surface is small, you can start from a corner.
Fix the tile with glue mortar by tapping lightly with a mallet and using a wooden block, and check its horizontality with a spirit level.
Once the first tile has been laid, place a plastic crosspiece in each corner. For outdoor floors, choose large crosspieces that leave thick joints, as they will better absorb the expansions that the material may undergo due to temperature changes.
Once you have laid the first row, the work will be easier and you will be able to glue a larger surface.
How to install the skirting boards?
To reinforce the perimeter waterproofing between the wall and the terrace, apply a bead of silicone along the last row.
In addition to adding an elegant touch, skirting boards make it easier to clean the terrace with the water hose. To lay them, simply apply glue mortar on the opposite side, aligning their joints with those of the tiles.


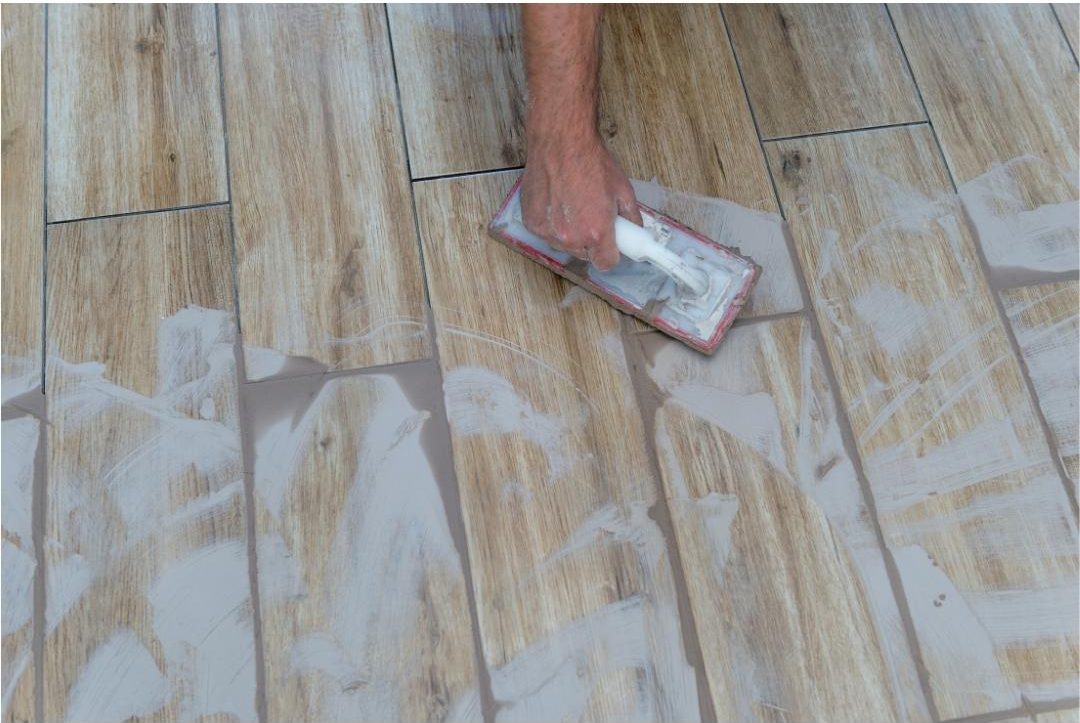
How to make the joints?
Once you have finished laying all the tiles, wipe off any cement glue that may have stuck to them with a cloth. The drying time depends on the material used and the manufacturer’s instructions, although you will have to wait at least 6 hours.
Prepare the grout and apply the creamy product on the surface and spread it immediately with the flexible rubber spatula.
Never grout horizontally or vertically, as filling one of the joints would unintentionally remove the grout from the perpendicular joint. Always grout diagonally. Then scrape off the excess product by running the spatula diagonally across the joint lines.
After 2 to 3 hours of drying, spread sawdust and wipe the tiles with a damp sponge to finish cleaning.
Here are some basic tips for the renovation of your terrace flooring and its installation, although it is always ideal to have it laid by a professional.
In our Moraval showroom you can see an infinite number of floor tiles for your terrace, come and choose yours, we will advise you on which one suits you best.